Technical notes: New and improved Vidroc Junior
|

|
Vidroc Junior is the on going
effort to create the smallest Vidroc possible. The original
attempt failed miserably as it used a system that wasn't really up to
the challenge. The rocket itself (Custom Rocket Company's Elite
egg lofter) was quite stable and the C engine boosted the weight of
the payload just fine, so I knew there was hope.
This second incarnation was based on
the proven XCam system and required just a few modifications to get it all
to fit properly.
|
 |
The first thing I needed to do was to
trim off excess areas if the transmitter's pc board. It didn't need
a lot, but this little amount makes it easy to fit the transmitter length
wise into the payload section.
The red lines on the left and right show the areas
to trim away, ignore the numbers as this image was from the XCam wiring
schematics.
|
 |
Next was replacing the patch antenna
with one that would fit inside the nose cone. The antenna
shown in this image came from a Symphony network card. I originally
used it in Vidroc 4 but found it lacked the altitude range V4 could
travel. Seeing as how VJr. wouldn't fly nearly as high, I
tried it out and for now I'm satisfied with the results.
The batteries and antenna tuck into the upper half
of the payload section with a little chunk of foam used to separate them
from the top of the transmitter.
Currently, I use a micro switch to activate the
camera, though I may refit the system with a micro plug jack like I use on
the other Vidrocs. |
 |
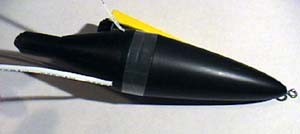
Here's a close up of the custom flare I made for the
camera.
- I first cut away the plastic just enough for the
camera to clear
- Then I made a mounting plate for the camera with
1/16 plywood
- Glued that into place at the base of the hole
- Fitted and glued a section of plastic bottle to
form the shroud
- Applied Plumber's Epoxy Putty to fill in the gaps
and sanded it to get the final shape.
|
Original
Vidroc Junior attempt
In an attempt to fly an even lighter remote
video system, I tried making a smaller system that could be flown with a B or C
engine-based rocket. I selected the PTV16
wireless video camera from Plantraco
because for $99.00 it looked like it could do the job. The ad stated that
line of site could be as much as 700 feet but that 200 feet was easily achieved,
so it seemed like a good candidate for this project.
The system is quite small and easily fits
inside a standard "egg loft" nose cone.
I was willing to sacrifice color and audio
for more image resolution and lighter payload weight, but try as I might, I
couldn't get a lighter power source to work with the PTV16 (it draws some
serious amps). Naturally, I tried to use the same power supply I was using for
the X10 system but PTV16 burned through that power supply in less than a minute.
The PTV16 operates with a standard 9 volt transistor battery, so I was forced to
use that. Ironically, in the end the PTV16 (2.1 oz) was heavier than the stripped
down X10 camera (1.9 oz).

I used Custom Rocket Company's Elite
(egg lofter) rocket with my own fin design and an added a second
stage.
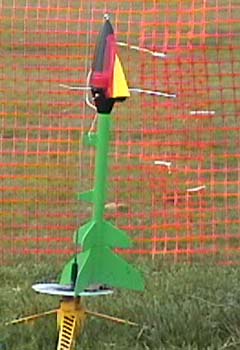
The camera is mounted with foam mounting tape
to the side of the nose cone and I built a simple (yellow) flaring to improve
its aerodynamics. Finally assembly is done with (red) electrical tape, pretty
much like you prep the nose cone for a standard egg loft.
back to Rocket
Science
digital
phenomena home page